Showing posts with label makeup. Show all posts

Monday, May 11, 2015

FACE BRUSH MASTER CLASS


POST BY AMY NADINE, GRAPHIC DESIGN BY EUNICE CHUN


Welcome back to Brush Class, beauties! If you remember, a couple months ago I showed you which face brushes to use for different coverage (revisit it here). Today we're taking it a step further and showing you which brush to use for all the different finds of complexion products. And the new brushes out there now are what I'm most excited about! I can't even begin to tell you how far face brushes have come since I went to makeup school back in 2003. We applied foundation (which only came in two forms, liquid and cream) with a sponge! So come with me on this journey as I simplify everything for you and open your world to the next generation of brushes!


BB CREAM: Instead of a regular foundation brush, use a Light Coverage Foundation Brush (try Dior Backstage Foundation Light Coverage Fluid Brush


) because BB Creams (like my favorite Benefit Big Easy BB Cream) look gorgeous when you apply them in layers, and this brush is designed to layer thinly instead of depositing a lot at once.


CREAM FOUNDATION: You're going to DIE for this type of brush. It's my new favorite thing ever and it makes me so happy!! It's a hybrid between a Buffing Brush and a traditional Foundation Brush but its shape and dense head really press the foundation into the skin when you swirl it in circles across your face and neck. The best one I've found so far is the Marc Jacobs The Face II Sculpting Brush and my favorite cream foundation is Jouer Age-Repairing Perfector Foundation


.


LIQUID FOUNDATION: Most of us use a typical Foundation Brush for Liquid Foundation and can continue to do so if you want really full coverage. But if you don't want anyone to see that you're wearing foundation, invest in the BECCA The One Perfecting Brush because it's designed so the product sits on top of the bristles instead of absorbing it, allowing you to deposit it more evenly without wasting it. And the long design makes contouring areas so-o easy. And you know we're still so obsessed with NARS Sheer Glow Foundation


because it gives great coverage with the perfect amount of luminosity.


POWDER FOUNDATION: I used to use a fluffy powder brush to apply powder foundation until I discovered the buffing power of a kabuki brush! Try Tarte Airbuki Bamboo Powder Foundation Brush


with Josie Maran Matchmaker Argan Powder Foundation.


SPRAY FOUNDATION: You can use a Spray Foundation in two ways. You can spray it directly from the can (our favorite is the cult classic Dior 'Diorskin Airflash' Spray Foundation


) or you can spray it in the palm of your cupped hand, swirl the Blurring Brush over it then swirl it all over the face and neck. A Blurring Brush works with liquid foundation as well and gives the most beautiful airbrushed finish of all the brushes. Our favorite is Urban Decay Good Karma Foundation Brush


.


BRONZE/HIGHLIGHT/BLUSH: Wait until you get your hands on this uber-wide fan brush and get into the habit of gently grazing your cheek products with it! Try the MAKE UP FOR EVER 134 Large Powder Fan Brush with Urban Decay Naked Flushed Cheek Palette


.


**Please keep in mind that these are just our preferences and we welcome your constructive comments on your preferences below. We're just so excited about the evolution of face brushes that we wanted to introduce them to you if you haven't discovered them already. We know they are pricey so if you know of less expensive alternatives, please share them as well! What I did when building my kit was invest in one new brush a month, knowing that they last for at least a decade (some a lifetime if you take care of them properly!). But you could build your arsenal even more slowly with a new one every few months. And revisit my Brush Wash Tutorial and take good care of them!


Thursday, February 19, 2015

Gossip Discussion: Is It Cheaper To Keep Her?


Last night the Lakers beat the Atlanta Hawks 86-78, but that's not what was on the minds of nosey folks like myself. The more important thing I wanted to know about was why was Vanessa Bryant at the game cheering on Kobe?! Not that she can't be there because she's still his wife and she can be anywhere she likes to be, but after all the divorce rumors that were going around, I was sure as hell the last place we would see Vanessa was at a Kobe Bryant game.

Well, divorce no more (I'm going to assume) because the two were caught swapping spit after all was said and done. I guess she really was there while he was shooting in the gym!! I kid! I kid!! However, could the two be back on good terms? Or is the old saying "It's cheaper to keep her" the route Kobe is looking to go?

Either way, I'm glad the two seem to be working it out because their divorce doesn't get finalized until June of this year, but you never know if that divorce is going to go through. So my question to you guys is......Is it really cheaper to keep her? Or would you rather cut your losses which for Kobe that would be 3 mansions and $75 million.

I'm curious to hear what you guys have to say so please leave any thoughts or comments you may have in the comments section. I'm listening!

Sunday, February 8, 2015

NIGHTTIME MOODY MAKEUP


POST + PHOTOGRAPHY BY AMY NADINE, GRAPHIC DESIGN BY EUNICE CHUN


Try this eye the next time you go out and bring out your moodier side ! This is especially perfect for those of you who don't want to look like you spent time doing a smoky eye, but want the same drama. It's such a gorgeous middle ground between the hardness of black and the softness of gray. Here's how:


TOOLS:


  • Black Sparkle Liner - Try Sephora Jumbo Liner 12HR Wear Waterproof in 16 Glitter.
  • Black Liquid Liner - I used Alexa Chung's Eye Do Liquid Liner because it's the most user-friendly of all the felt-tip pens.
  • Black Kajal Liner - Pick a really greasy-looking one that so it's shiny but also one that is longwear so it doesn't smear down your cheeks. I used Tarte Skinny SmolderEYES Amazonian Clay Waterproof Liner in Onyx.
  • Black Voluminous Mascara - I used Covergirl Bombshell by Lashblast Mascara because it creates huge lashes and has a shiny black topcoat.
  • Pearl Sparkle Shadow Stick - Try NARS Soft Touch Shadow Pencil in Hollywoodland.

STEPS:


  1. Sweep the upper lashline with the Jumbo Liner. Go thick. I like to stop just before the crease but you can certainly include it.
  2. Trace the lower lashline, but not as thickly obviously!
  3. Trace the liquid liner just along the upper lashline for intensity. See above for thickness.
  4. Rim the inner waterline with the kajal liner to make the eyes really piercing.
  5. Coat the lashes with mascara.
  6. Dab the pearl shadow stick on the inside corner of the eye as demonstrated above.

Friday, July 11, 2014

cosmickrust this is the first time ive seen


cosmickrust this is the first time ive seen


cosmickrust:


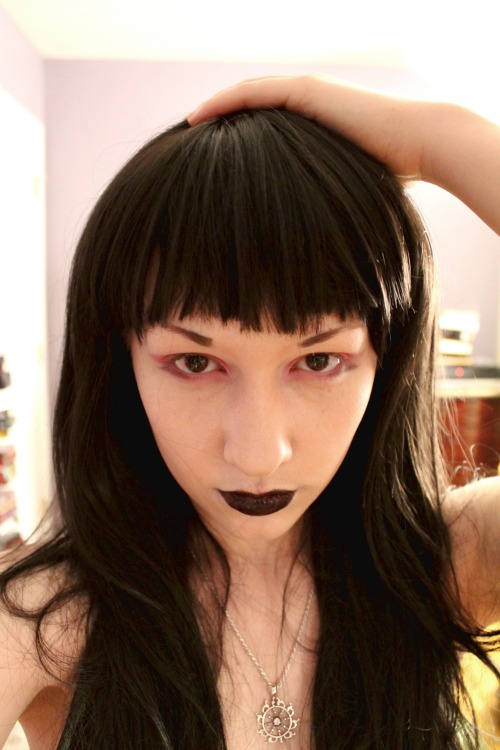
“This is the first time I’ve seen you look less feminine after putting on makeup.” -Dad


Looks like I’m not wearing a shirt. I was. 


Whoa, love the makeup + wig!


Monday, June 16, 2014

Gossip Pics: K. Michelle & J.R. Smith Smooching In The Club


Today's "Gossip Pics" was courtesy of GlobalGrind.com who recently posted up a picture of Vh1's "Love & Hip Hop Atlanta" star, K. Michelle and her on again/off again boyfriend, J.R. Smith, smooching in the club.

The smooch was apparently captured at the nightclub "Kiss N Fly" last night out in New York City where K. Michelle was hosting. The two even tweeted that they would be going home together for the evening!!


You can check out more photos of the smooch as well as the couples tweets to each other when you click on that "Read More" button below:


And now the tweets:


I'm happy for my friend in my head! She looks so cute and giddy with her man! What are your thoughts?

Friday, May 30, 2014

THE LIP HIGHLIGHT


Post + Photography by Amy Nadine, Graphic Design by Eunice Chun


You're probably thinking, not another thing for me to do! But trust me, this one's worth it! Especially if your lips are your best feature. Any time you want to draw attention to a feature, highlight it! And if you try this technique with red lipstick, forget about it! Here's how:


TOOLS:


  • Your favorite liquid highlighter (you can see my three favorites by clicking here)
  • Your finger

STEPS:


  1. Start with the bottom lip and trace the perimeter directly with the highlighter brush.
  2. Continue just above the upper lip as demonstrated above.
  3. Blend the upper line with your finger until it's almost undetectable.
  4. Repeat with the lower line.

Wednesday, April 23, 2014

the best beauty looks at milan fashion week


the best beauty looks at milan fashion week


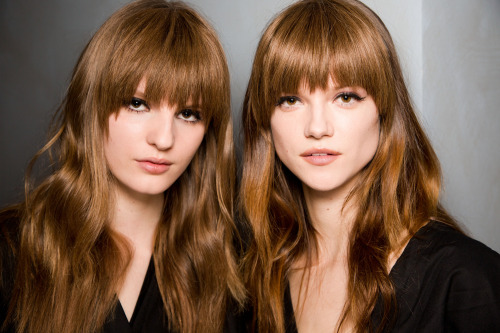
The best beauty looks at Milan Fashion Week (including the super-’60s hair at Pucci). Photo: Mark Leibowitz


Thursday, November 28, 2013

SOFTEN UP


Tutorial + Photography by Amy Nadine, Graphic Design by Eunice Chun


Some of us get stuck in the mind frame that we only use liner to line. A few months ago I showed you how to use Liner As Shadow, now I want to remind you of (or teach the newbies!) the simple and oh-so pretty smudging technique. It's actually the genesis of the smoky eye before eyeshadow came along! Anyway, there's something very modern and soft about a smudged liner. Here's how:


TOOLS:


  • Your Favorite Kohl Pencil - I used my favorite, Chantecaille Gel Liner in Jet, because it glides on with ease and with an angled brush on the other end to smudge with. I also love the Covergirl Liquiline Blast Liner in Black Fire.
  • Smudge Brush - I'm obsessed with Sephora's Smudge #11 Brush because it really presses and works the liner into the skin.
  • Nude Eye Shadow - whenever you use a non-waterproof liner, it's best to first powder your lid with powder or eyeshadow so the pencil doesn't transfer onto the crease.
  • Mascara - pick one that really separates and coats each lash. I used Eyeko Skinny Brush Mascara, an iconic line from London that coats each lash with fibers.
  • Nude Shimmer Shadow (Optional) - I highlighted the inner corners with the classic Stila Eyeshadow Kitten.

STEPS:


  1. Sweep the nude shadow all over the lid and crease.
  2. Line the upper lashline with the pencil. Don't worry about it being perfect.
  3. Start with the smudge brush on the inner corner and sweep incrementally in short strokes as you work your way across to the outer corner.
  4. Now turn around and go back from the outer corner to the inner corner. Take a quick study and see if you need to repeat.
  5. Line the lower lashline however you choose (I did only 3/4 s from the outer corner, but you can certainly line the entire lashline).
  6. Smudge the line like you did the upper lashline with short quick strokes.


You can leave it as is, or to finish the look, continue with an inner corner highlight and a couple coats of mascara. Then if you really want extra drama, go back and rim the inner waterline with the gel liner.


Friday, August 2, 2013

KEEP YOUR FACE ON!


Post + Photography by Amy Nadine, Graphic Design by Eunice Chun


This two-product wonder is critical if you want your makeup to last when the temperature rises. If you've surrendered to the idea that your foundation can only last a couple of hours this summer, I promise you, you're mistaken! You just need the right primer before you apply it then you have to lock it in with a setting spray. Here's how:


TOOLS:


  • Long-lasting Primer - there are many primers available today, some are hydrating, others are radiating... so it's a little overwhelming. In this case, you want to look for one that is long lasting. I love Benefit Stay Flawless 15-Hour Primer because it actually lasts for all day (believe me, it has saved me on never-ending commercial shoots when I thought I'd have to redo the makeup halfway through only to be happily surprised that it looked like I just applied it).
  • Setting Spray - you can set your makeup with all kinds of water sprays; Evian Vaporizing Mist, Floral Waters, etc and all will do the job. But if you live in a really humid area and know you're going to "glow" a little more that day (ok, perspire profusely!), try Skindinavia No More Shine Makeup Finish. I swear by it because it prevents makeup from smearing or creasing and really controls shine.

STEPS:


  1. On bare skin (or moisturized if your skin is really dry), apply the primer by sweeping it all over your face directly from the stick.
  2. Now you can apply your foundation (pick one with full spectrum sunscreen) with a foundation brush, fingers or a sponge. Powder your t-zone if necessary.
  3. After you've applied the rest of your makeup (but before mascara), finish by holding the setting spray bottle 10-12 inches from your face and spritz five times (one for each area: forehead, right cheek, left cheek, nose and chin).

Tuesday, February 26, 2013

SETTING YOUR MAKEUP WITHOUT CAKING IT


POST + PHOTOS BY AMY NADINE, GRAPHIC DESIGN BY EUNICE CHUN


For years I used a big fluffy brush to powder my clients’ faces after foundation, even though in makeup school we were taught to use a powder puff. It just felt more luxurious and didn’t have to be restocked all the time like a puff. But last year, I went back to a puff because I started getting frustrated with the way the brush was not only pushing and sliding the cream blush from the area I specifically placed it, but it was also grabbing onto the foundation and making everything a little cakey. Not good. So I went back to the puff press technique created by the masters of Old Hollywood cinema back in the late 30′s and felt a little stupid that I ever strayed. Here’s how:


TOOLS:


  • Loose Powder: I used Korres Mineral Loose Powder to give more coverage (and it’s 100% natural and talc-free), but any setting powder will do.
  • Powder Puff: I used Cinema Secrets Pro Puff but you can use any from your local drug store or beauty supply.

STEPS:


  1. Sprinkle a good amount of powder onto puff.
  2. Fold the puff together like a taco, with the powder in the middle and your two thumbs on either side like demonstrated above.
  3. Rub the sides back and forth against each other to really work the powder into the puff.
  4. Fold the puff in the opposite direction so the powder is now on the outside.
  5. Press and roll the puff all over the face or your t-zone to really press the powder onto the foundation.

If you really want to spoil yourself, Cle de Peau Translucent Powder is the holy grail of setting powders because the powder is ultra-fine and creates a radiant sheen while the puff feels like cashmere! It’s an investment but my personal one has lasted me a couple years.